Rox ModDocs

Installation

This guide is all about getting Rox mod up and running smoothly on your Operating systems, perfect for setting up your personal server at home or a dedicated server on a Virtual Private Server.

Before you start installing the mod, it's important to make sure your SOF2 folder is clean. This means removing any other mods or modifications that might interfere with the Rox mod's proper functioning. Alternatively, you can simply download a clean copy of SOF2.


Supported OS
Debian and Ubuntu are officially supported, while compatibility with other distributions has not been verified.
Support spans Windows NT 4.0, Windows 2000, and onwards.

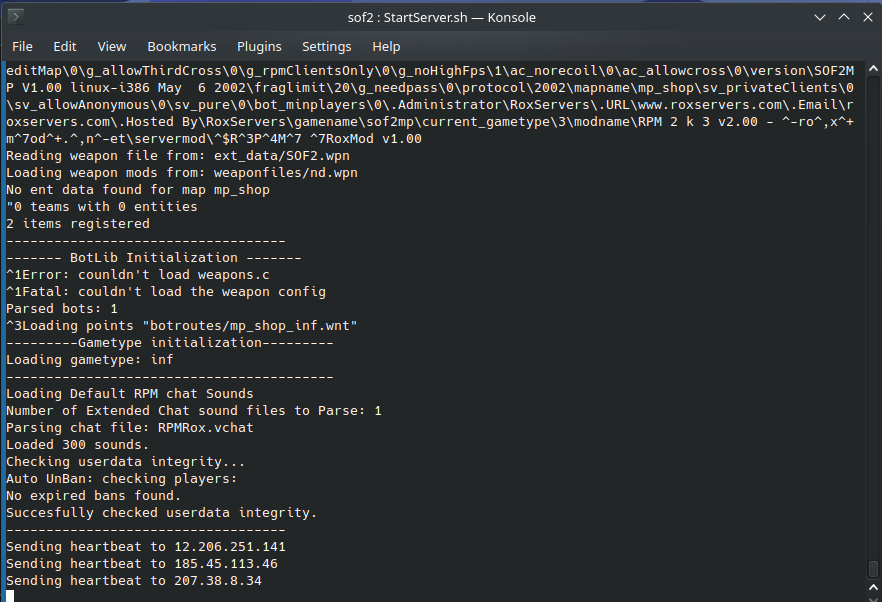
Installing the Mod on Linux

Installing the mod on Linux is as easy as downloading and extracting the files into the SOF2 directory. Once you have downloaded a clean copy of the SOF2 folder, you can extract the Rox modlinux.tar.gz file into the SOF2 root directory.

linuxinstall

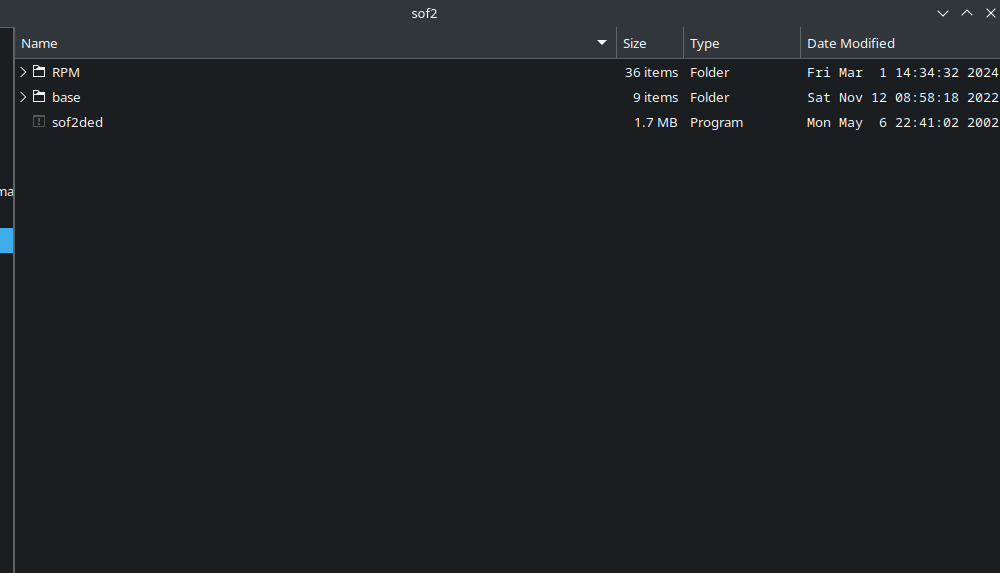
Once you have downloaded and installed the mod, ensure that you make the sof2ded executable and StartServer.sh script in the RPM Directory executable by running chmod +x.

linuxinstall

Please keep in mind that there may be instances where the patches fail to apply at runtime. To resolve this issue, you can edit the /etc/sysctl.d/10-ptrace.conf file (create it if it doesn't exist yet) and add the following line: kernel.yama.ptrace_scope = 0.

Installing the Mod on Windows

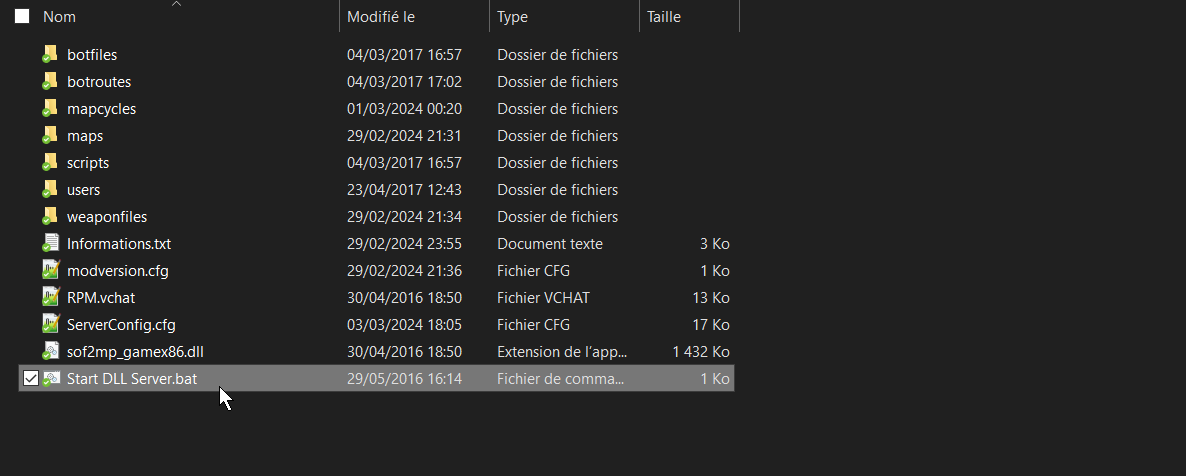
Just like on Linux before proceeding to install the Mod, make sure you have a clean copy of the SOF2 folder. Once this is done, simply extract the Rox Mod files into the SoF2 directory and click on "Start DLL Server.bat" file to start your server.

windowsinstall windowsinstall

Server Management

Rox Mod is fully customizeable and you will find many easy ways to manage your server.

Admin System

The admin system is straightforward and should feel familiar commands are short, consistent, and easy to manage.

There are 2 ways to call an admin command: in chat using !shortcommand, or in console using /adm longcommand. Both the player's ID (#i) and name (n) are accepted as target arguments.

Chat  !tba 1 10 wallhack - bans the player with ID 1 for 10 days for wallhack.

Console  /adm timeban 1 10 wallhack - same as above using the long command form.


Admin Commands list

Short Long Command Arguments Description
br broadcast <message> Broadcast a message
m mute <#i/n> Mute a player
tm timemute <#i/n> (time) Timemute a player
um unmute <#i/n> Unmute a player
st strip <#i/n> Remove weapons from a player
b burn <#i/n> Burn a player
p pop <#i/n> Kill a player
pl plant <#i/n> Plant a player in the ground
upl unplant <#i/n> Unplant a planted player
ro runover <#i/n> Boost a player backwards
uc uppercut <#i/n> Launch a player upwards
u uppercut <#i/n> Launch a player upwards (alias)
fl flash <#i/n> Flash a player
k kick <#i/n> (reason) Kick a player
ba ban <#i/n> (reason) Ban a player
tba timeban <#i/n> (d) (r) Temporary ban a player
sb subnetban <#i/n> (reason) Ban a player's subnet
ub unban <#line> Unban a banned player
su subnetunban <#line> Unban a banned subnet
bl banlist Print the banlist
sbl subnetbanlist Print the subnet banlist
rs respawn <#i/n> Respawn a player
ft forceteam <#i/n> <team> Force a player to a team
rn rename <#i/n> <name> Change the player's name
et eventeams Make the teams even
sw swapteams Swap the teams
sh shuffle Pick random teams
cva clanvsall All clan players vs the rest
l lock [team] Lock a team
ul unlock [team] Unlock a team
pa pause Pause the game
up unpause Unpause the game
acl addclan <#i/n> Add a clan member
rc removeclan <#i/n> Remove a clan member
cl clanlist Show clan list
clr clanlistremove <#line> Remove player from clan list
ab addbadmin <#i/n> (pass) Add a Basic Admin
aa addadmin <#i/n> (pass) Add an Admin
as addsadmin <#i/n> (pass) Add a Super Admin
ra removeadmin <#i/n> (pass) Remove an Admin
al adminlist (pass) Show admin list
adr adminremove <#line> (pass) Remove player from admin list
adl addleader <#i/n> Add a Team Leader
rl removeleader <#i/n> Remove a Team Leader
gr gametyperestart Reset the gametype round
mr maprestart Reset the map
mc mapcycle Load next map in mapcycle
map map <map> (gt) Load the specified map
dmap devmap <dmap> (gt) Set a specific map (Cheats)
amap altmap <amap> (gt) Set a specific modified map
ml maplist Show all available maps
g gametype <gametype> Load the specified gametype
sl scorelimit <score> Change the scorelimit
tl timelimit <minutes> Change the timelimit
ri respawninterval <seconds> Change the respawn interval
s speed <value> Change the speed
gv gravity <value> Change the gravity
cm compmode Competition mode on/off
gf goldenflag Golden flag on/off
ff friendlyfire Friendly fire on/off
fd falldamage Fall damage on/off
cmp anticamp Enable or disable anticamp
nn nonades Enable or disable grenades
nr noroof Enable or disable noroof
nl nolower Enable or disable nolower
nw nowhole Enable or disable whole
3d third Enable or disable 3rd person
3c thirdcross Enable or disable 3rd cross
nd normaldamage Load normal damage settings
rd realdamage Load real damage settings
con cheatson Enable the cheats
cof cheatsoff Disable the cheats
clm clearmap Clears all extra map entities
v callvote <vote> Call a vote
pv passvote Pass the current vote
cv cancelvote Cancel the current vote

Admin levels

For example, if you want to elevate the permission level of an admin command, such as restricting the "kick" command from being usable by admins at level 3 or below, and instead make it accessible only to admins at level 4, you can do so effortlessly.

  • [0] Disabled admin command
  • [2] B-Admin
  • [3] Admin
  • [4] S-Admin
  • [5] RCON
  1. Check and edit the ServerConfig.cfg file.
  2. Modify the admin command levels in the file.

Warning

Setting the admin level to 0 will disable the admin command.

Managing Admins

We use the sqlite3 backend for managing admins. Admins are stored in the users.db file, which is located in the users folder. You can easily edit the tables yourself. We recommend downloading a database browser for SQLite. This is only necessary if you want to manage the admins offline. Otherwise, you can use the provided commands in the game to add and remove admins (such as addadmin, adminlist).

Passworded Admins

Rox mod supports passworded admins as a solution for players with dynamic IP addresses.

You can enable the passworded admins system in the ServerConfig.cfg file by setting the parameter g_passwordAdmins "1".

  1. Once enabled, you can add an admin with password by adding the "pass" argument at the end (e.g: "!aa #id pass).
  2. The player matching #id number will then be assigned a custom password set by you in the ServerConfig.cfg according to the admin level value (in this case: g_adminPass).
  3. Once this is done, the player will be able to change its password to a custom one in-game.
Console Commands
ATTENTION Please be aware that the playertag has to match the name in the database. If you change your tag, the login will no longer work.
/adm password serverpass This command will log in with the password that is set in the ServerConfig.cfg. It is always required when adding the player to the admin passlist for the first time.
/adm password serverpass newpassword You can change the current password set by the server owner to a custom one (your own).

Warning

Server owners should carefully select who to grant passworded admin access to. Since the admins are not based on IP but rather checked with their playertags, if other users gain access to their password, they can rename themselves and log in with the password.

Bad Words Filter System

To ensure that playing the game is only about fun, we decided to implement a basic Anti Bad Words system. The idea is to set up a list of words that you want to be banned from the server. Every time a player is using this word, it is replaced by "*" characters in the chat.

To enable this, activate the "g_noBadWords" parameter in your ServerConfig file, then add words in the badwords.db file inside of "users" folder, use any database editor (like db browser) to modify the file.

Mapcycle System

You can define a default map that your server will start on, but you can also set up a complete mapcycle to allow players to play different maps. To do so, simply uncomment (remove "//" characters) in from of the mapcycle commands in your ServerConfig and choose the mapcycle used.

Here below, find an example of how to set up a mapcycle for your server

mapcycle

Sounds System

The mod features a sound cache system that enables the utilization of more than 256 sounds, allowing players to effectively add up to 300 sounds.

When adding extra sounds to the RPMRox.vchat file, players can easily locate a specific sound by using the command /extrasounds followed by the sound name.

linuxinstall
linuxinstall

Scrim System

Rox mod offers a fully customizable Competition Mode that allows to set up matches between teams easily.

Setting up a match

To start a match, use !cm (chat) or /adm compmode (console), configure your settings, then restart the map with !mr:

compmode settings

If players are running RPM 2.0 or the Rox Anticheat client mod and one of the following cvars is active, the match will start autorecording as soon as competition mode is enabled:

  • 2k3_record - for RPM 2k3 client mod
  • g_compModeRecord - for Rox Anticheat client mod

Team Commands

A comprehensive list of Team Commands can be found during Competition Mode by writing "/tcmd" in console:

compmode team commands

Custom Gametypes

Besides providing standard gametypes such as Infiltration, Capture The Flag, ... we also want to offer players the possibility to play different gametypes that bring more fun to the game. Here is a list of custom gametypes that you can play.

Hide & Seek

Hide & Seek is the most popular custom gametype in the SOF2 community, and has been for years. It was pioneered around 2007 by 2k3Servers, one of the earliest dedicated SOF2 server hosters, and has since become the backbone of the game's remaining playerbase.

The gametype splits players into two teams: Hiders and Seekers. Hiders must stay alive and out of sight for the duration of the round using the map's geometry, boosts, and movement to reach hard to reach spots. Seekers hunt them down armed with a knife and special grenades that slow Hiders down. The last two surviving Hiders each round are rewarded with a special weapon for the next round.

Firearms are not used all combat is knife-only, which gives the gametype its unique feel. Hiders can stun a Seeker to briefly gain speed and escape. Movement and map knowledge are everything.

hide&seek

Cops & Robbers

The goal is simple: Cops must catch the Robbers before time runs out, while Robbers try to stay out of jail for the duration of the round.

It plays similarly to Hide & Seek, but with a key difference Robbers aren't killed, they're sent to jail. A jailed Robber can escape by knifing a Cop, or by being knifed by a free Robber. Knives also have a unique mechanic: players can jump on them after they've been thrown.

cops&robbers

Demolition

Demolition was originally a Raven Software gametype introduced in the SOF2 Gold patch (v1.03), inspired by Counter-Strike's bomb defusal mode. However, 2k3Servers privately ported it to SOF2 v1.00 (Silver) through their own unreleased mod making it available on the original version of the game long before anyone else did. Rox carries that torch forward, bringing Demolition back to v1.00 as a public, fully supported gametype.

It's a round-based, no respawn gametype every life counts. The attacking team must plant a bomb at one of two designated sites and protect it until it detonates. The defending team wins by eliminating all attackers before a plant, or by defusing the bomb in time. First team to win enough rounds takes the match.

The round structure and tight economy of movement make it a natural fit for competitive scrims, and it remains one of the most tactically demanding gametypes in SOF2.

demolition

Gun Game

Gun Game is a community classic inspired by the Counter-Strike mod of the same name, brought to SOF2 by Rox Mod. Players spawn across the map armed with a knife and pistol and must work their way up through the weapon roster every 5 kills with your current weapon earns you an upgrade. The goal is to reach the final weapon (RPG7) and get 5 kills with it to win.

Getting knifed (sliced) by another player downgrades your weapon with one exception: if the victim is carrying armor protection, the knife kill does not trigger a downgrade. If gg_Extra is enabled, heavier weapons come with a speed penalty, adding a risk/reward element to climbing the ranks.

gungame

Zombies

Zombies is another gametype pioneered by 2k3Servers. The round starts with one player randomly chosen as the first Zombie their goal is to infect the remaining players. Any Human killed by a Zombie joins the undead, turning the round into a race against an ever growing horde.

Humans fight back with whatever weapons they have. Each Zombie killed drops weapons or ammo, keeping Humans supplied as long as they can stay alive. The last Human standing at the end of the round wins.

zombies

Map Editor

Rox Mod includes a live in-game map editor that lets admins (level 4+) place, move, rotate, resize and delete entities directly on the server no external tools required. Changes are stored in a gametype-specific .ent file and persist across map restarts.

Getting Started

The map editor is activated by setting g_editMap 3 in the console.

ValueModeDescription
3EditFull entity editing move, rotate, resize, delete

Controls

All controls are button-based and work while g_editMap 3 is active. Hold Walk to slow all movements to ¼ speed for fine-tuning.

Selecting an Entity

InputAction
ReloadSelect entity at crosshair position
Attack + Alt AttackSelect nearest entity to your position

Moving (Attack held)

Movement is view-relative the entity moves in the direction you are facing.

InputAction
Attack + W / SMove forward / backward
Attack + A / DMove left / right
Attack + Space / CrouchMove up / down
Attack + Zoom In / OutRotate on X axis (pitch)

Resizing (Alt Attack held)

InputAction
Alt Attack + W / SShrink / grow on X/Y axis
Alt Attack + A / DShrink / grow on Y/X axis
Alt Attack + Space / CrouchGrow / shrink height (Z axis)
Alt Attack + Zoom In / OutRotate on Z axis (roll)

Rotation

InputAction
Zoom In / OutRotate on Y axis (yaw)

Deleting

InputAction
Firemode (no selection)Delete nearest spawn point to your position
Firemode (entity selected)Delete selected entity and its child entities

Child entities (attached models, effects, cage fences) within 50 units are automatically cleaned up. Jumppads and teleporters delete their linked effect entities as well.

addItem Commands

Entities are spawned at your current position using the /addItem console command. Type /addItem ? for the full list in-game, or /addItem [command] ? for a specific item's usage.

Pickups

CommandDescription
weaponSpawn your currently held weapon as a pickup
ammoSpawn ammo for your current weapon
altAmmoSpawn alternate ammo for your current weapon
backpackSpawn a backpack (health + ammo)
healthsmallSmall health pack
healthbigLarge health pack
armorsmallSmall armor
armormediumMedium armor
armorbigLarge armor

Gametype Items

CommandDescription
blueflagBlue flag (CTF only)
redflagRed flag (CTF only)
bluecaptureBlue capture point (CTF only)
redcaptureRed capture point (CTF only)
blueFlagGroupBlue flag + capture point together (CTF only)
redFlagGroupRed flag + capture point together (CTF only)
caseBriefcase (Infiltration only)
casecaptureBriefcase capture point (Infiltration only)

Spawn Points

CommandDescription
spawnFree spawn point (Deathmatch)
bluespawnBlue team spawn point
redspawnRed team spawn point

World Entities

CommandDescription
model <path>Spawn a rox_model from models/ — faces your current view angle
bsp <name>Spawn a BSP instance by name
blockerSpawn an area blocker
NoRoofAdd a noroof zone at your position
NoLowerAdd a nolower zone at your position
locName <name>Tag your current location with a name (shown in kill feed)
startTeleportPlace the entry point of a teleporter
endTeleportPlace the exit point of a teleporter
jumppadSpawn a jumppad
cagefightSpawn a Hide & Seek cage (small or big)

Browsing Assets

CommandDescription
md3list [filter]List all available .md3 models — accepts optional keyword filter
bsplistList all available BSP instances

Misc

CommandDescription
deleteDelete the currently selected entity (and its children)
saveSave all entities to the map file
?Print the full command list

Saving

Run /addItem save to write all current entities to disk. The file is saved to:

maps/<gametype>/alt_<mapname>.ent

Each gametype has its own .ent file, so the same map can have completely different entity layouts per gametype. The save routine writes a worldspawn block, all player spawn points with correct team spawnflags, then all live entities with BSP and blocker entities always written last.

Unsaved changes are lost on map change

The .ent file is only written when you explicitly run /addItem save. A map restart or mapcycle will discard any unsaved changes.

Entity limit

The editor will warn you when the server is within 50 entities of the MAX_GENTITIES limit and refuse to spawn new entities to prevent a crash.